Home › Unlabelled › Wainscoting Around Corners - How To Install Board And Batten Wainscoting With A Plate Rail Az Diy Guy : Nail heads will be invisible, covered by baseboard and chair rail.
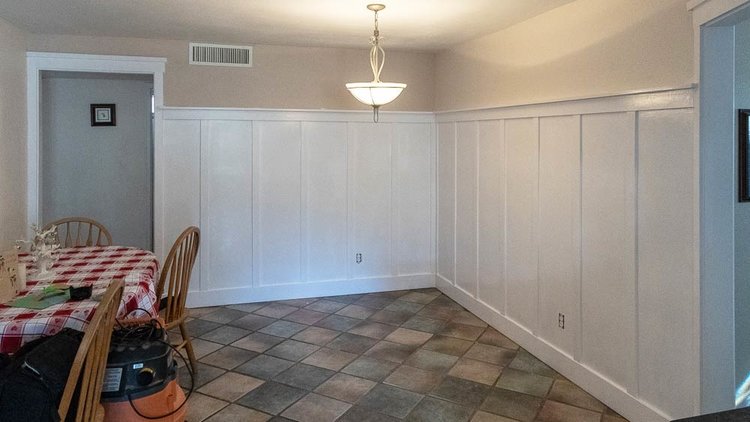
Wainscoting Around Corners - How To Install Board And Batten Wainscoting With A Plate Rail Az Diy Guy : Nail heads will be invisible, covered by baseboard and chair rail.. If the baseboards go on top of the beaded boards, nail them in place using #8 finishing nails. Below when i look around the internet at wainscoting installations similar to this one, i often find that the corner vertical style was left out. However, you can integrate pilasters into your corners both to help you make the transition (like i did on this staircase) between corners or simply as a decorative element. For the last few months, we've been contemplating how to spruce up our relatively small upstairs hallway (below). Hold it tight against the previous board and mark the board where it meets the corner of the outlet.
Click the image for larger image size and more details. Then, inspired by wilker do's recent board and batten video tutorial, i started gathering ideas on pinterest for an elegant but simple design that. Wall paneled wainscoting windows tips a few pointers in making corners depending on whether or not you have a table saw that will cut at a 45 degree angle, the mitered joint will give you the best results. Miter inside and outside corners. For the last few months, we've been contemplating how to spruce up our relatively small upstairs hallway (below).
How To Install Board And Batten Wainscoting With A Plate Rail Az Diy Guy from images.squarespace-cdn.com I worry about the look with a rounded drywall corner above, and the appearance of looking cheap. Fortunately, there is an old woodworker's trick that allows you to do just that, and all you need is your table saw. If the rail is complex, cope inside corners. Seamlessly ending the wainscoting at the bathroom sink is quite another. Locate the studs with a stud finder and mark the centerline of each with a level. Flexible molding bends to the contour of the wall, perfect for trimming out a curved stairwell. Cut corner panels to size. Toronto crown moulding milwork, decorative wainscoting 3d wall panels ideas, coffered ceilings, potlights installation decorative mdf crown molding , kitchen cabinets, wall units, 3d accent wall panels, custom millwork, archways, closets.
Before installing wainscoting around corners, measure the distance between the last panel and the corner on each adjacent wall.
Nail heads will be invisible, covered by baseboard and chair rail. Hold the same board alongside the outlet so the board's top edge touches the layout line. Dressed up master bedroom 😍. Toronto crown moulding milwork, decorative wainscoting 3d wall panels ideas, coffered ceilings, potlights installation decorative mdf crown molding , kitchen cabinets, wall units, 3d accent wall panels, custom millwork, archways, closets. Wainscoting in the bathroom, for example, may wrap around the room and eventually meet up with or act as the backsplash for a vanity or tub. We had installed wainscoting in our prior home's living room, and thought that might add the visual interest we were looking for here. Note the front door is still white in this picture, and the oak railing painting project hadn't taken place (yet). Countersink and fill all nail holes. Position the top of the wainscoting paneling at the chalk line and nail it with a pneumatic nail gun 1/2 inch from the top and bottom of the panels. Above the horizontal chalk line. Its not too difficult to wrap #wainscoting around a bullnose #corner thanks for watching finish #carpentry tv! Cut corner panels to size. This is because the corners should begin and end with a stile.
If you're installing wainscoting on a wall with a door opening, there are two design challenges into account. Unless the door opening is centered on the wall, the panels on either side won't be equal to one another. Nail heads will be invisible, covered by baseboard and chair rail. Oh and also we move an electrical outlet.becom. Eventually we continued installing wainscot up the stairs, and around the corner where the basement door is (on the right).
Wrap The Wainscotting Around The Corner Installing Wainscoting And Column Moldings Installing Wainscoting Living Room Update Room Update from i.pinimg.com Before installing wainscoting around corners, measure the distance between the last panel and the corner on each adjacent wall. If you watch it a few times at key points you can really get the idea. For the inside and outside corners, though, what should i do? If you're installing wainscoting on a wall with a door opening, there are two design challenges into account. Oh and also we move an electrical outlet.becom. This is because the corners should begin and end with a stile. However, you can integrate pilasters into your corners both to help you make the transition (like i did on this staircase) between corners or simply as a decorative element. Hold the same board alongside the outlet so the board's top edge touches the layout line.
Its not too difficult to wrap #wainscoting around a bullnose #corner thanks for watching finish #carpentry tv!
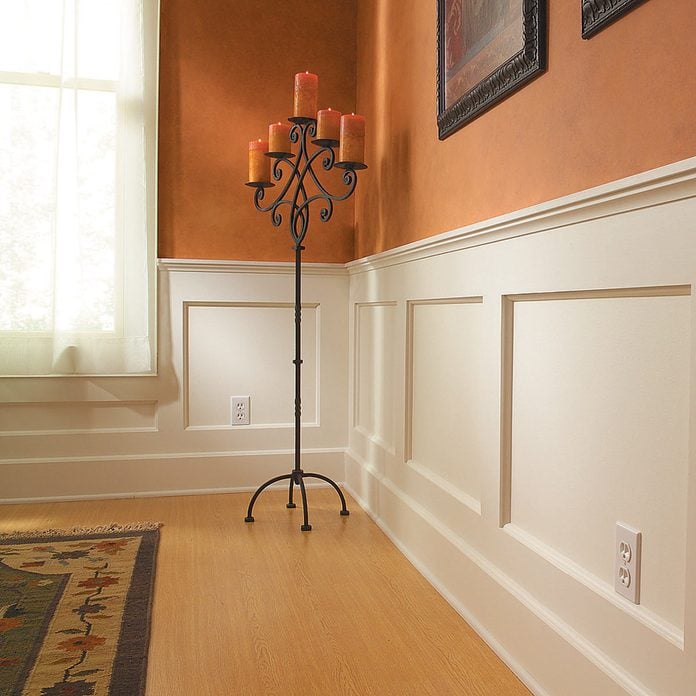
For the inside and outside corners, though, what should i do? Locate the studs with a stud finder and mark the centerline of each with a level. This is because the corners should begin and end with a stile. If you plan to paint the wainscoting, seal any gaps with paintable caulk. When laying out the wainscoting, look around the house for design clues. Hold it tight against the previous board and mark the board where it meets the corner of the outlet. They typically cover a portion and can end with a chair rail around the perimeter of your room. This has the effect of making the wainscoting look unsupported at the end — like it's just dangling out there in space. If you're installing wainscoting on a wall with a door opening, there are two design challenges into account. However, you can integrate pilasters into your corners both to help you make the transition (like i did on this staircase) between corners or simply as a decorative element. Then, inspired by wilker do's recent board and batten video tutorial, i started gathering ideas on pinterest for an elegant but simple design that. Nail heads will be invisible, covered by baseboard and chair rail. When a board must be notched around an outlet, rest the board's bottom edge on the upper lip of the outlet box.
This kind you can wrap right around those corners without including some structural element like a vertical stile or pilaster. Wainscoting stiles on inside and outside corners. If the baseboards go on top of the beaded boards, nail them in place using #8 finishing nails. Miter inside and outside corners. When a board must be notched around an outlet, rest the board's bottom edge on the upper lip of the outlet box.
How To Build A Wainscoted Wall Diy from www.familyhandyman.com In that case, homeowners might choose to extend. This is because the corners should begin and end with a stile. I'm installnig 40 beadboard wainscoting around my bathroom. Wall paneled wainscoting windows tips a few pointers in making corners depending on whether or not you have a table saw that will cut at a 45 degree angle, the mitered joint will give you the best results. An easy way to dramatically change the look of a room without spending a lot of money is to install wainscoting along the walls. But just because wainscoting is no longer required to keep your home warm doesn't mean it's lost all its magic. Below when i look around the internet at wainscoting installations similar to this one, i often find that the corner vertical style was left out. Wainscoting in the bathroom, for example, may wrap around the room and eventually meet up with or act as the backsplash for a vanity or tub.
They typically cover a portion and can end with a chair rail around the perimeter of your room.
Installing wainscoting is a relatively easy task to accomplish, but installing it on a rounded corner presents some difficulties that must be overcome. If the baseboards go on top of the beaded boards, nail them in place using #8 finishing nails. Oh and also we move an electrical outlet.becom. This is because the corners should begin and end with a stile. In that case, homeowners might choose to extend. Note the front door is still white in this picture, and the oak railing painting project hadn't taken place (yet). Nails along the outside edge. If you plan to paint the wainscoting, seal any gaps with paintable caulk. Nail heads will be invisible, covered by baseboard and chair rail. Click the image for larger image size and more details. If the rail is complex, cope inside corners. There should be a seamless transition around the corner. Wall paneled wainscoting windows tips a few pointers in making corners depending on whether or not you have a table saw that will cut at a 45 degree angle, the mitered joint will give you the best results.